Without a doubt, mountain bike season is finally upon us, and we’re pretty stoked to get out on two wheels again. However, many of us probably haven’t been on our bikes in months and had them sitting in the garage all winter. After heading out for the first few rides of the year, you’re probably noticing some clunking and creaking from your bike, so it’s time to give your bike a good once-over to make sure everything is running at its best. No stress, we know many bike shops are still closed or have service departments backed up for weeks, but this is something you can easily do in the comfort of your own home or garage.
RELATED: Learn How to Corner Like A Pro With Brendog
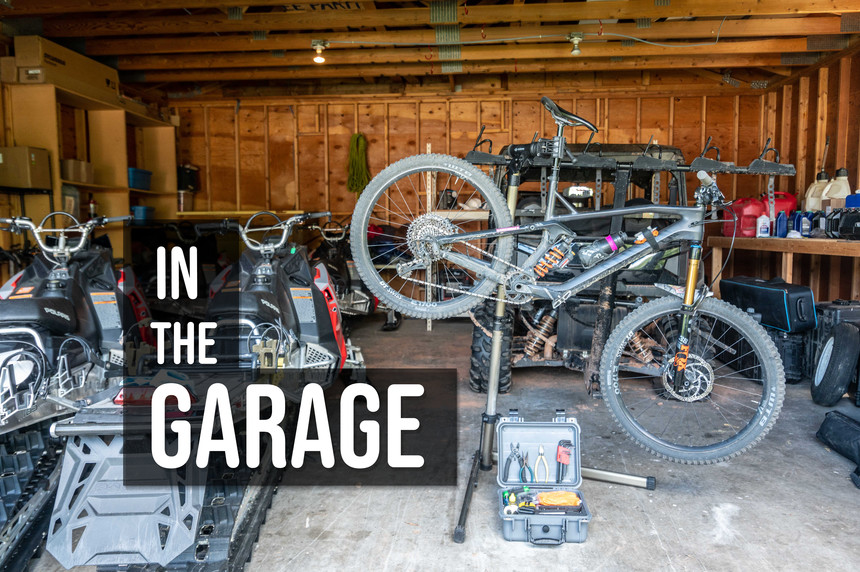
TGR is kicking off a new how-to bike mechanic series In The Garage, and for Part 1 we want to get you ready for the upcoming season. Check back soon for more topics, including everything from simple tasks to deep dives into suspension maintenance and upgrades for your ride.
Identifying the problem is admittedly the hardest part of bike maintenance, but we can promise that it gets easier with time and experience. Before hopping on your bike for the first ride of the season, set aside a few minutes to check everything over. That means going over things like suspension, shifting, wheels, brakes, and inspecting your frame for any damage from last season you may have forgotten about.
Frame Inspection:
Today’s mountain bikes are very strong but are certainly not unbreakable. We like to ride hard, and know that you probably do too, so chances are you’ll break something at some point. On a carbon fiber bike, check for any cracks that might have formed from rock strikes, shuttling or crashes. Those tend to form around or under your bottom bracket, on your chainstays, or under your downtube where a tailgate or bike rack would contact. On an aluminum frame, check those same areas, as well as all welds where your frame is joined together.
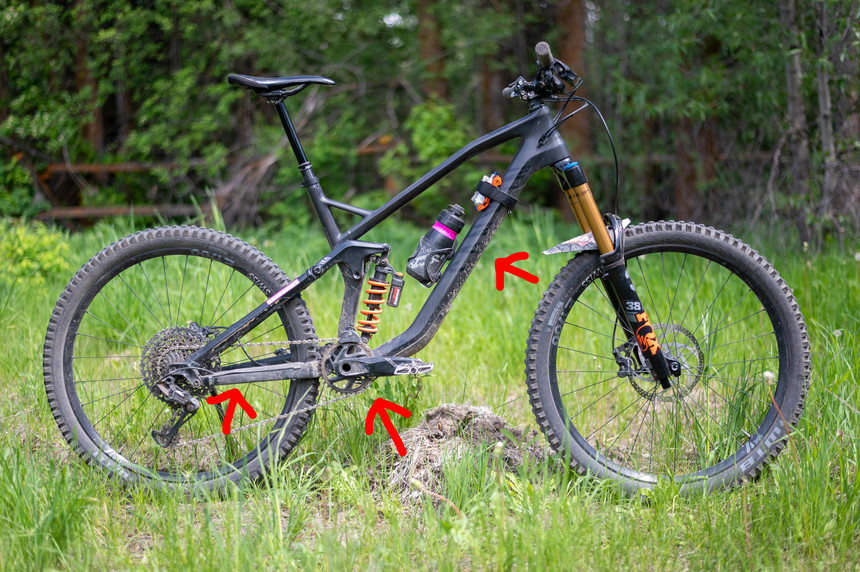 Check these areas on your frame where rock strikes and shuttling typically cause damage. Max Ritter photo.
If you find any cracks or damage, we suggest you don’t ride your bike until contacting the manufacturer. Most brands will offer some sort of crash replacement or warranty to help you out if the damage is bad enough to render the frame unusable. Alternatively, carbon can sometimes be professionally repaired.
Wheel Inspection:
Before diving into this part, it’s important to understand the anatomy of a bike wheel. There are five basic parts to a mountain bike wheel: a tire, a rim, nipples, spokes, and a hub. Spokes hold tension between your hub and rim, keeping it round and true (bikespeak for laterally straight) as the wheel spins and rolls over terrain.
Over time due to stresses and impacts, some spokes will lose tension, causing your wheel to develop a side-to-side or even up and down wobble. That’s bad and can lead to frame damage or even catastrophic wheel failure. Additionally, hard landings and rock strikes can bend aluminum rims or crack carbon ones, which will lead to flats and eventually wheel failure.
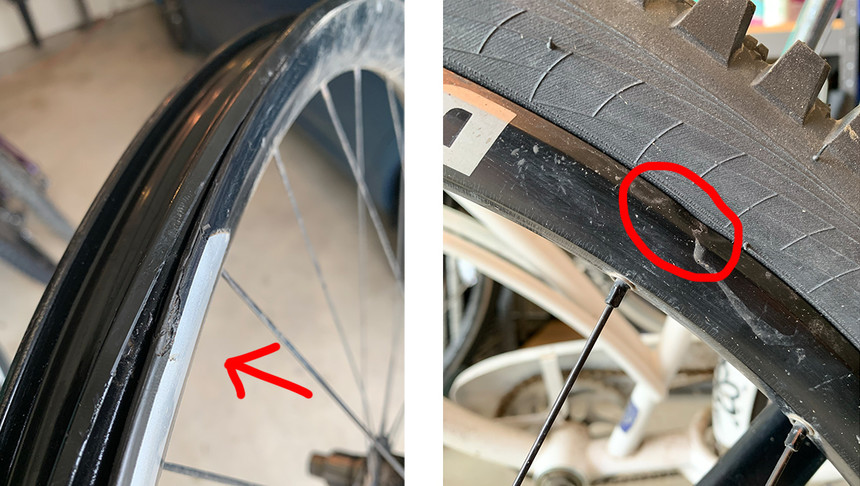 Cracked carbon is bad, and will require a new rim. Bent alloy, on the other hand, is typically fine to ride on as long as it holds air. Max Ritter photos.
A quick spin of your wheels should easily identify any obvious issues here, like if your wheel is out of true or even bent. Keep an eye on the bead of your rim as it rotates, and you can identify any dents or cracks from impacts.
Suspension Setup:
Most mountain bike suspension is air-sprung, and as it sits over a whole winter, some air can leak out of your fork and shock. A very simple but vital step to your pre-season checkup is making sure your suspension is still set up appropriately to your rider weight. Grab your shock pump, a small zip tie and a 2mm Allen key, and follow these simple steps to set your sag to make your suspension feel buttery smooth. Disregard the following if you run coil-spring suspension on your bike.
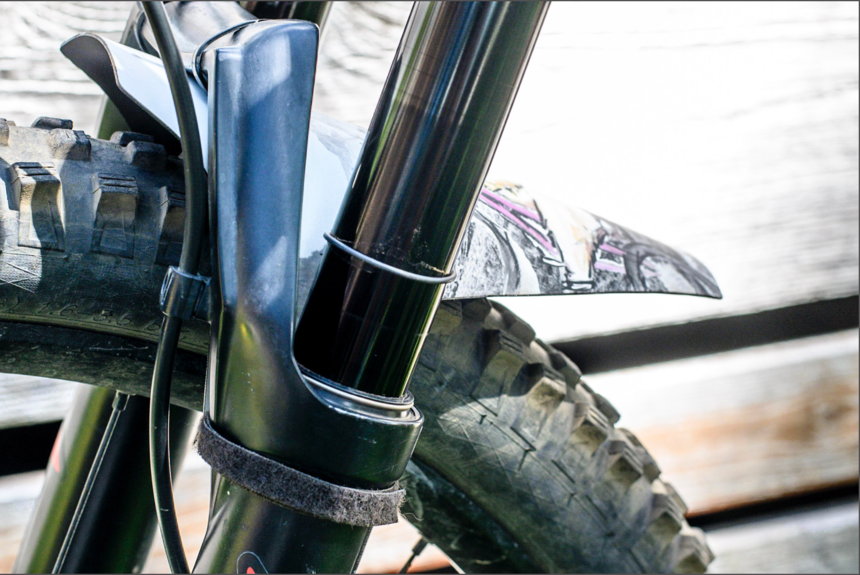
On most forks, the left side leg contains the air spring assembly. Unthread the air cap and use the 2mm Allen key to press the valve underneath it. You should hear air escaping and your fork should fall into its travel. Wait a few seconds for all the air to come out. When all the air is out, carefully insert the small zip tie between your left stanchion and the dust seal ring to let air out of the lowers. This will usually result with another “psssst” and the fork bottoming out its travel. Or, if you're running suspension that has bleed valves, depress the little buttons on the backside of each fork leg to accomplish the same thing.
 Checking your pressure before the season is a good move. Max Ritter photo.
Take your shock pump, thread it into the air cap and re-inflate your fork to your desired air pressure. Refer to the chart printed on the fork leg (for Rockshox or Fox forks) or go online to see the recommended air pressure for your riding weight for other manufacturers.
Finally, check your sag. Slide the moveable rubber ring on your air spring side all the way to the bottom. Then, get on your bike (ideally with someone sitting on your front wheel to help you balance) and stand up on your pedals in an aggressive riding position. Get off carefully and note the position of the ring. If you have the proper psi in your air spring, that ring should be sitting at around 20-30 percent of travel. Inflate or deflate as necessary.
 For most riders, 20-30 percent sag is appropriate. Max Ritter photo.
For your shock, locate and unthread the air cap, and let out all the air as you did for your fork. There is no need to insert a zip tie between the stanchion and the seal. Re-inflate the shock in 25-50 psi increments, stopping to cycle through travel a few times to charge the negative air spring as you inflate. Refer to your bike’s user manual or go online to see the recommended air pressure for your riding weight. Each shock/frame combo will have different settings, and be careful not to exceed to psi limit printed on the shock body. Finally check your sag the same way as you did for your fork. For most frames, 30 percent sag is the sweet spot.
Drivetrain:
The clickety-clack of a drivetrain that’s not set up correctly might the single most annoying sound and feeling in mountain biking. The sound and loss of performance is most likely due to one of two things: a bent derailleur hanger, or lack of tension in your shifting cable. Luckily, both are super-quick fixes.
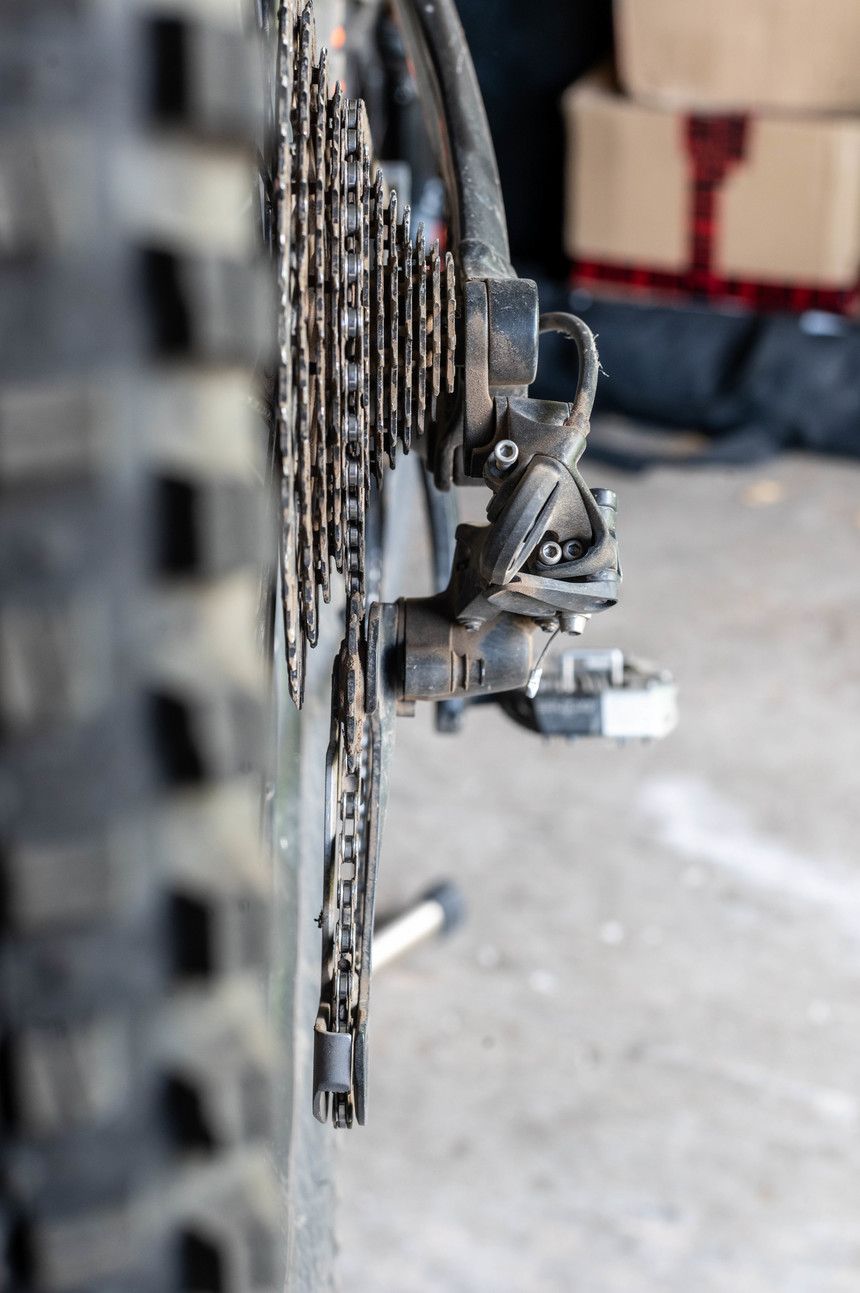 A bent rear derailleur or hanger will make your shifting skip. Max Ritter photo.
To check your hanger’s alignment, look from behind your bike first. Your derailleur’s cage should be in a perfect line both vertically and laterally. If it looks bent at all, your shifting performance will likely be off. If it is in fact bent, you might want to consider a new derailleur hanger (these are specific to your frame, but are cheap and meant to be replaceable), or trying to bend it back straight using a hanger alignment tool or a large adjustable wrench. It should be noted that you can more or less get away with riding a slightly bent hanger without shifting issues.
The more likely culprit is that you have lost some tension in your shifter cable housing. Over time, the housing your cable runs through actually compresses, leaving you with imprecise “ghost” shifting. Easy fix. All you need to do is add tension to make sure your derailleur once again lines up with your cogs. Find the barrel adjuster on your handlebar shifter and turn it counterclockwise a quarter turn at a time to add tension to your cable until your shifting runs smooth. It's easy to add too much tension, so pay attention and back it off if you add too much.
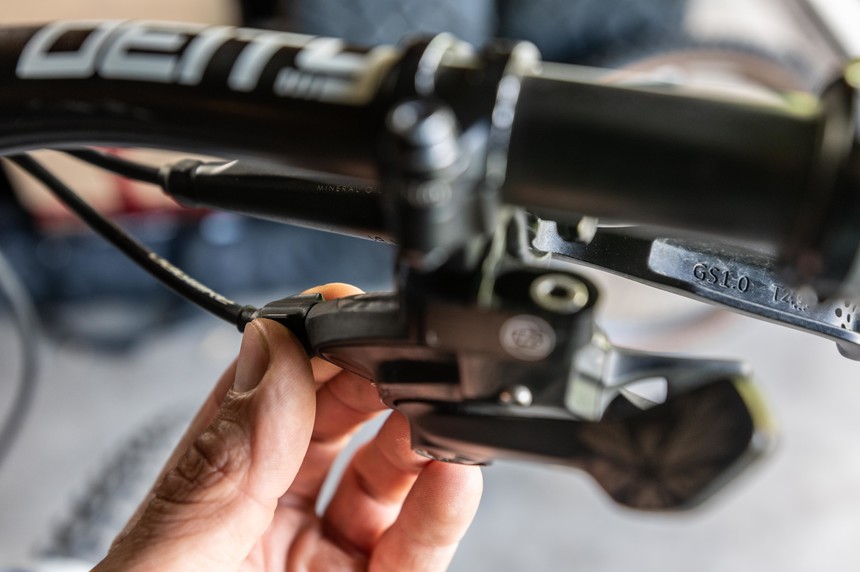 Twist the barrel adjuster a quarter turn at a time to increase tension on your shift cable. Max Ritter photo.
Finally, inspect your front chainring and cassette for any damage or bent teeth, and go ahead and lube your chain to get everything running nice and smooth.
Brakes:
We’re saving the topic of how to bleed mountain bike brakes for a future episode, but a quick inspection of your brakes, pads, and rotors usually all you need before starting your season. Take a peek at your pads to check they are not too worn to ride on. Remove your wheel and pull the pads out of the caliper if that makes visual inspection easier.
 Check your brake pads to make sure there is enough pad material left. We're all guilty of using our brakes too much, and pads wear down faster than you might think. Max Ritter photo.
If the pad material is less than 1mm thick, it’s time to replace the pads before they become dangerous to ride on. Likewise, inspect your rotors for excessive wear and any grooves or discoloration from overheating, and replace those if they are worn. Finally, look at your calipers and levers to check for any signs of hydraulic oil leaking (this can be a tough one to spot but tell-tale signs are smears around the seam in your caliper or where your hose enters the lever body). If you have a leaky caliper or lever, consider a warranty or purchasing a new one.
Tires:
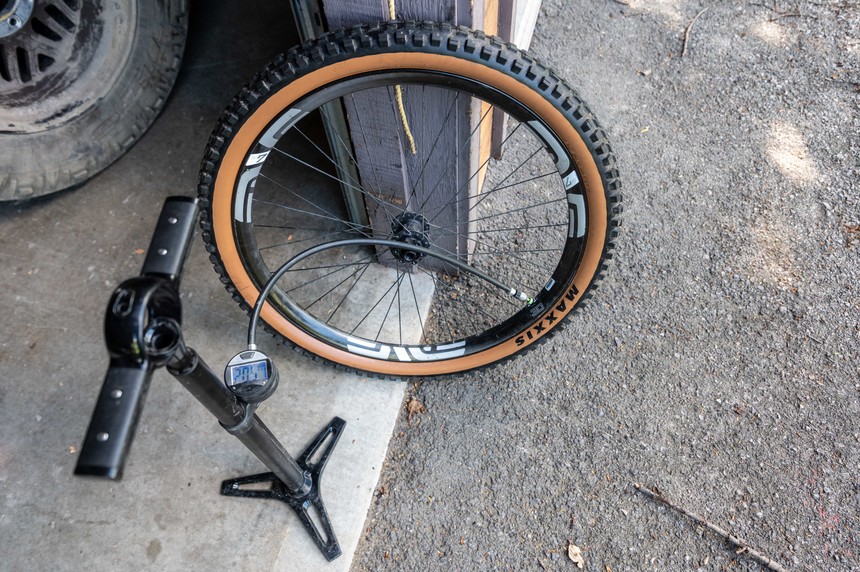 Before any ride, I like to check tire pressure. Max Ritter photo.
Last but not least, check your tires to make sure they're still inflated to an appropriate pressure. If you are running tubeless tires, take a look inside each tire and make sure the sealant is still fresh. If it's dry and rubbery, it's time to add some fresh sealant.
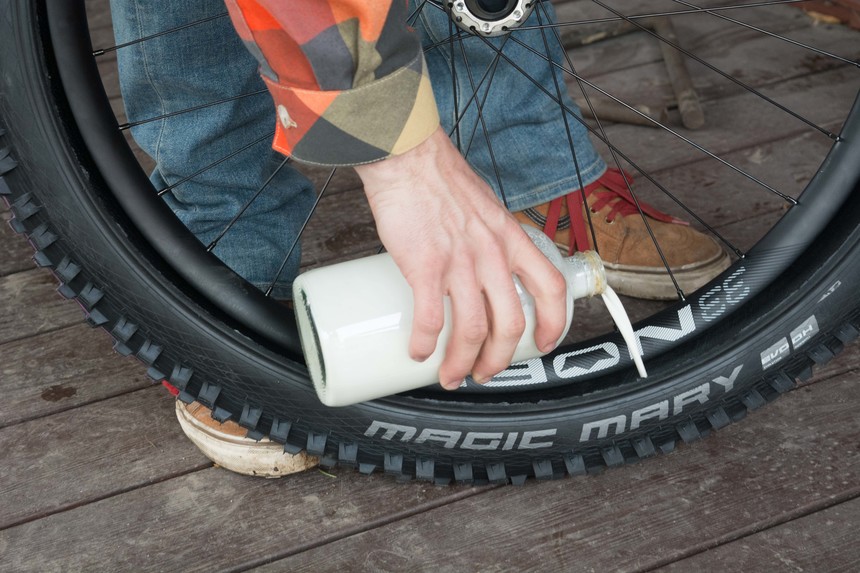 Add some fresh sealant if the old stuff has dried out. Max Ritter photo.
Perhaps the most common question I get asked is "what pressure should my tires be at?" The answer is simple: it depends. Low pressure gives you traction, but you run the risk of pinch flats. High pressure will typically give you less rolling resistance and less risk of pinch flats, but less traction. As a general rule, anywhere from 20-26 PSI is good for front tires, and 22-28 PSI for the rear.
From The Column: In the Garage
In the Garage: 2 Ways To Set Up Tubeless

In the Garage: How To Bleed Your MTB Brakes

In the Garage: Buying Used Bikes

In the Garage: How to Clean Your MTB

In The Garage: Inspecting A Bike After A Crash

In the Garage: What’s In Your Pack?
In the Garage: How to Adjust MTB Shifting
In the Garage: What’s the Deal With Tire…
In the Garage Ep. 2 – What’s In the Tool Box?
In the Garage Ep. 1 – Early Season MTB Checkup
About The Author
stash member Max Ritter
I manage digital content here at TGR, run our gear testing program, and am stoked to be living the dream in the Tetons.