 Splitboard Education Collective Founder Kelly Robbins teaches splitboard guides, instructors, and clients in the field. Kelly Robbins photo.
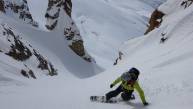
If your skinning technique is completely dialed and your transitions are under three minutes, then these tips might not be for you. But if your kick turns remind you of Godzilla stomping Japan, or you would love to skim some time off your time spent crawling up to your favorite powder stash, open your ears.
Founder of the Splitboard Education Collective in Salt Lake City, Kelly Robbins has been teaching snowboarders how to get around on their own two feet as a full-time splitboard guide for nine years. He gives us an overview about the ten most important (and misunderstood) skinning concepts that can better the experience of up-and-coming splitboarders.
#1: Figure Out the Big Picture
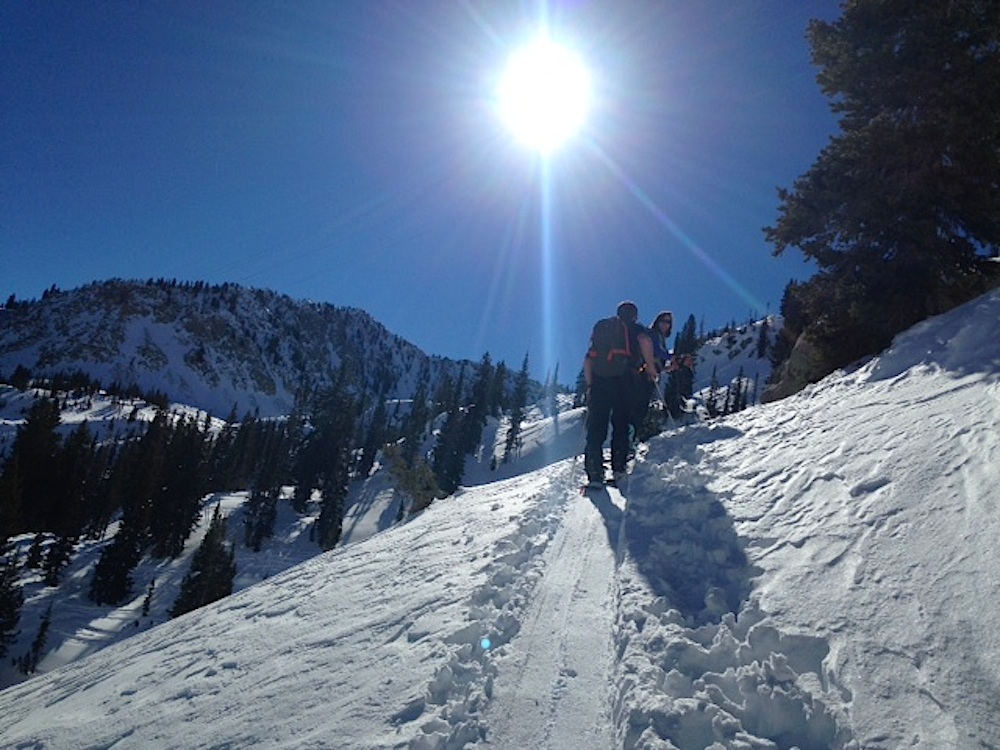 Keeping cool on a hot day in the Wasatch. MacKenzie Ryan photo.
You need to find your inner hippie to get your breathing, your mind, and your pacing in synch. You’re going uphill for 90% of your splitboarding career. You want to find a way to embrace that. Skinning isn’t something to just ‘get over with’ in order to ride; it’s part of the experience, and it’s part of the process.
Think about skinning uphill as this bigger thing.
First, be conscious of what’s going on in your mind. What’s your thought process? Some people like music, some people don’t like music. I personally don’t. For other people, it brings everything into synch.
Second, be conscious of your breathing, and develop a rhythm with your breathing.
Third, be conscious of all your physical stuff. If you try to buckle down and push things, you’re going to hit the wall. Eat and drink on a schedule. Be aware of how you are weighting and placing your feet. Adjust your layering system to adequately maintain your temperature so that you’re not sweating bullets, and then crash as you’re walking up a ridgeline.
#2: Choose Low-angle Approach Routes
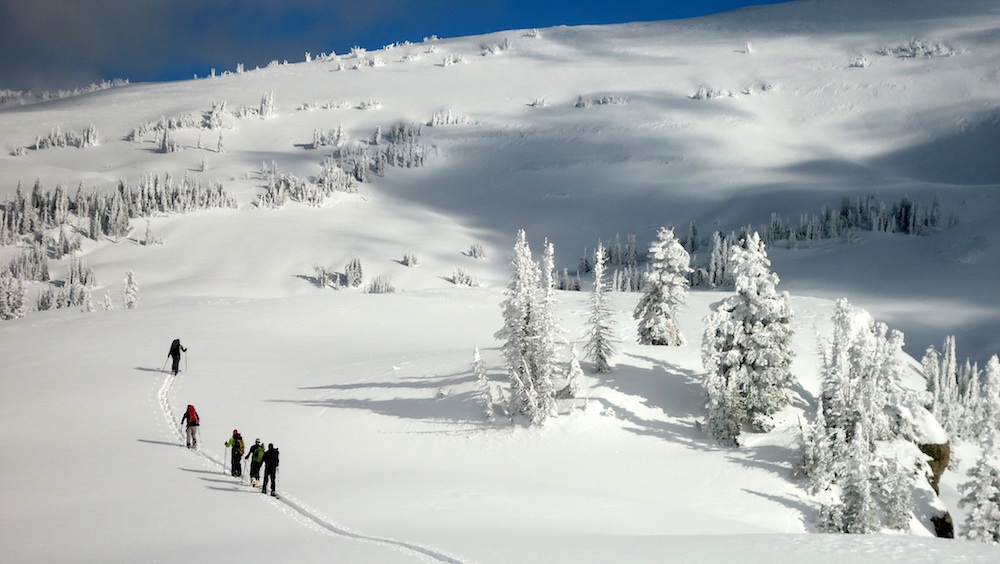 The most efficient skintrack is between 12 and 15 degrees. Kelly Robbins photo.
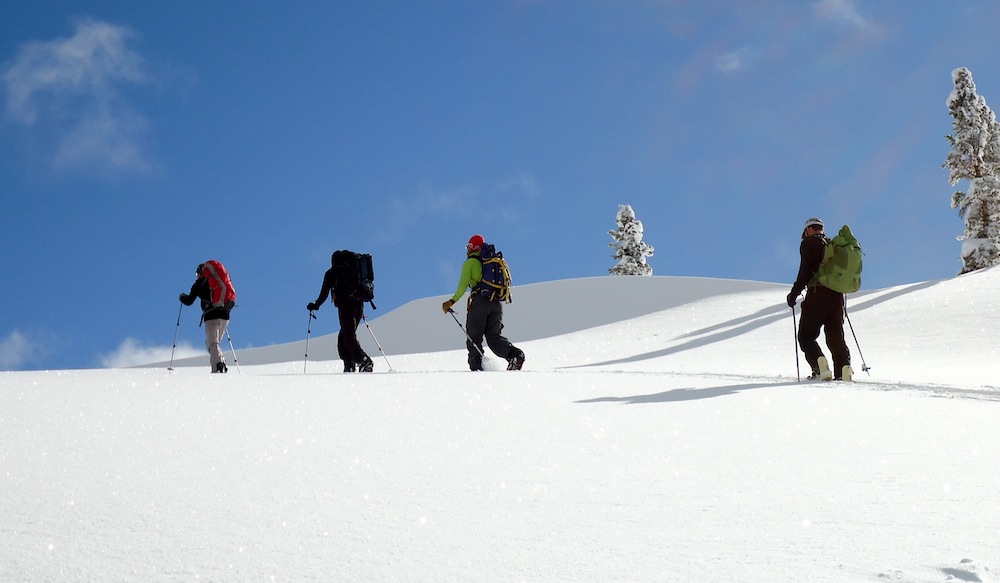
When you’re choosing an approach route, choose an efficient approach route. Long and low angle is efficient; short and steep isn’t.
In terms of energy expenditures, short and steep might be quicker, but it will use way more energy than a long and low-angle approach. In real popular areas, it’s common to see short and steep approaches for a couple of different reasons. Some people don’t know. Some people feel like a hot shot–I suspect that’s part of it.
To each his own, but for longevity and efficiency, take the long, low-angle approach so you can talk to your buddies and keep your head up while you skin. You can do that for 50 years; you can’t do short and steep for 50 years.
Also, regarding approaches, you can look at route selection and terrain choices on different scales. If you’re in the parking lot in Little Cottonwood Canyon, and want to get to Mt. Wolverine, you can look at a topographical map, and connect low-angle ridges to get there. On a microscale, you want to be able to read terrain choices in front of you, and be able to avoid a steep rollover by walking around it.
The most efficient skintrack angle is 12-15 degrees–that's super low-angle. That’s what they’ll teach mountain guides. If I do need to climb a 35-degree slope, I pick sub-ridges and slopes to make a low-angle skintrack up it.
You can tell a very well-placed skin track. It’s kind of a work of art. It winds around. You never had to put your heel risers up because you were able to use the terrain to your advantage.
You can tell a very well-placed skin track. It’s kind of a work of art. It winds around. You never had to put your heel risers up because you were able to use the terrain to your advantage.
It’s tough in the Wasatch. You never get to break trail, and so you're at the mercy of whoever put it in first. When I’m following a skintrack, I’m never shy about following it for a ways, then breaking away to avoid this steep section, and creating a low-angle loop. Often the established skin tracks are slippery and icy. Avoiding that is a side benefit of breaking your own trail.
#3: Maintain Good Posture
Now that we’re out on skin track, our mind is straight, and we’ve picked our route. We’re skinning along flats.
You want to be standing straight up and down, perpendicular to your skis. Stand vertical so that gravity is going straight through you. Keep your shoulders back, and your chin up so that you are completely weighting the skin over your heel, and getting better purchase from your skins by weighting your heels. Good posture, with shoulders back, also helps with big picture concepts like breathing.
To aid with good posture, your poles aren’t used out in front of you to power you forward. They’re on the side, straight up and down, to keep your balance. There are certainly exceptions, like steep, little sections.
#4: Master Your Weight Transfer
Weight transfer is an important concept for good skinning technique. Here's an easy example to think about: if you’re walking up a steep slope, and your weight is distributed evenly on both feet, you’re more likely to slip back than if 100% of your weight is on one foot and and the other is lifted. It will stick better than if your weight is distributed 50/50.
As you get into steeper terrain and other challenges, you want to minimize the time it takes to get transfer 100% of your weight from one foot to the other. You have 100% on right foot, take a step with your left foot, and quickly shift your weight to from right to left foot. In that transfer, that’s when you lose it and slip.
As it gets steeper, push with your heel to maximize skin contact. If your toe or the balls of your feet lead, it minimizes skin contact. The steeper the terrain gets, that’s where heel risers come into play. Heel risers allow you to keep weight on your heels and not fall over backwards.
![]() Robbins demonstrates a rest step at the entrance of Grizzly Gulch, Little Cottonwood Canyon. MacKenzie Ryan photo.
Robbins demonstrates a rest step at the entrance of Grizzly Gulch, Little Cottonwood Canyon. MacKenzie Ryan photo.
Mastering good technique and mastering good posture without your heel risers is super-important. You don’t have to put heel risers up all the time. When you do need the heel risers, it’s a good benefit. But good heel risers won’t save you from bad technique. You see people slipping with heel risers up, and more experienced splitboarders gliding right by without heel risers.
I think sometimes heel risers are overused. If I can tour for an hour, and not put them up by choosing good terrain using good technique, I’m happier. When they are needed, they are needed.
The heel riser conversation and how you’re weighting your skis and heels are associated with the weight transfer. If you step right with weight on left, and your weight rocks to your toes and balls of your feet, your weight distribution goes to 50/50 and you lose it.
Good posture and a 100% to 100% weight transfer are part of what we call the "rest step." After you step, you take a pause, set your skin, transfer your weight, and then straighten your leg to make sure you’re giving your muscles a break. For example, if you’re on an icy skintrack, you’ll set your skin to make sure it's gripping, and then make the transfer. After you transfer your weight, you’ll extend your leg.
#5: Improve Your Kick Turn Technique
This goes back to the terrain selection piece. If I choose a low-angle approach, I can round out a corner to avoid the kick turn. You want to read terrain to maximize efficiency. Kick turns are not efficient–especially if you blow it, you use so much energy.
If you do need to do a kick turn, having good technique–that 100% to 100% weight transfer–is critical. Kick turns involve subtle body movements. You set your downhill ski, place your poles, set your uphill ski, move your hips to transfer your weight from the downhill ski to the uphill ski, and then you need to bring the downhill ski around and set it in the skintrack.
Kick turns can be fluid, but they involve discrete steps.
Before you start a kick turn, walk out past the corner. (That way, when you finish the kick turn and flip your downhill foot around, you step right into the skin track). Make a nice platform for your downhill foot, then plant your uphill foot. I like the platform for my downhill foot to be perpendicular to slope rather than going up the slope. It creates better balance, and better purchase.
If you place your uphill ski and immediately start to transfer your weight to it, it's hard to open up your hips. Instead, try to drop your uphill ski back a bit, swivel your hips towards the uphill ski, and then transfer your weight from your downhill ski to the uphill ski. That 100% to 100% is super important. Otherwise, you'll slide backwards on your toes.
I often see people come up to the corner, stomp their downhill foot, place their uphill foot, and then drag the tip of their downhill ski as they transfer their weight from the downhill ski to the uphill ski. To avoid dragging the tip of downhill ski, I flick my ankle to pop the tip of the ski up.
I also plant my downhill pole outside of the downhill ski so it's out of the way. I plant my uphill pole almost behind me. If the poles are too close, they interfere with the kick turn.
Keeping your posture straight also aids your kick turns. If you get too hunched over, you'll come up on your toes.
#6: Take Small Steps in Steep Terrain
 On the flats? Big steps. On a steep approach? Small steps. Kelly Robbins photo.
Take small steps in steeper terrain, bounce from one heel to the other, and stay upright–it makes for an easier weight transfer. On flats, take big steps and use your poles as you stride.
If you are on a steep hill with undulations, your tip and tail can get on the high points. Then you step, and the ski bows. That's not good purchase.
It's better to have weight right on the hill with the tip and tail not touching the ground. The middle part of the skin is the most important part. I like to think, 'How can I place my foot to maximize the grip?' Every little step in steep technical terrain, you have to very conscious of where you are placing your step, and adjust to undulations.
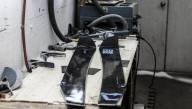
#7: Take Care of Your Skins
Skins will last you five or seven years if you take care of them.
Throughout the day, you don't want to get snow on the skins. On a cold, snowy day, I'll ride with my skins in my jacket. It keeps the glue warm. They stick better when I transition back to touring mode. If it's a wet day, I dry off my board before I transition. Before I put the skins on, I put them on my lap and rub them to warm them up.
Snow can work its way under the tails. You can use touch-up glue, like rubber cement. If there’s little spots on my tails, I touch them up. This was especially important before splitboard tail clips came out.
After you get home, hang your skins up and drape them, glue side up, to dry overnight. You'll be happier the next morning when you go to put them on.
Seasonally, you will ruin your skins if you store them in the hot attic, or keep them in the back of your car on a hot, sunny day. Really warm temps will change the quality of the glue. Cheat sheets are pretty much for summertime storage. Using them in the field decreases efficiency. Used skins aren't as difficult to come apart. Hook your skin on your ski, put the ski near your belt, and pull.
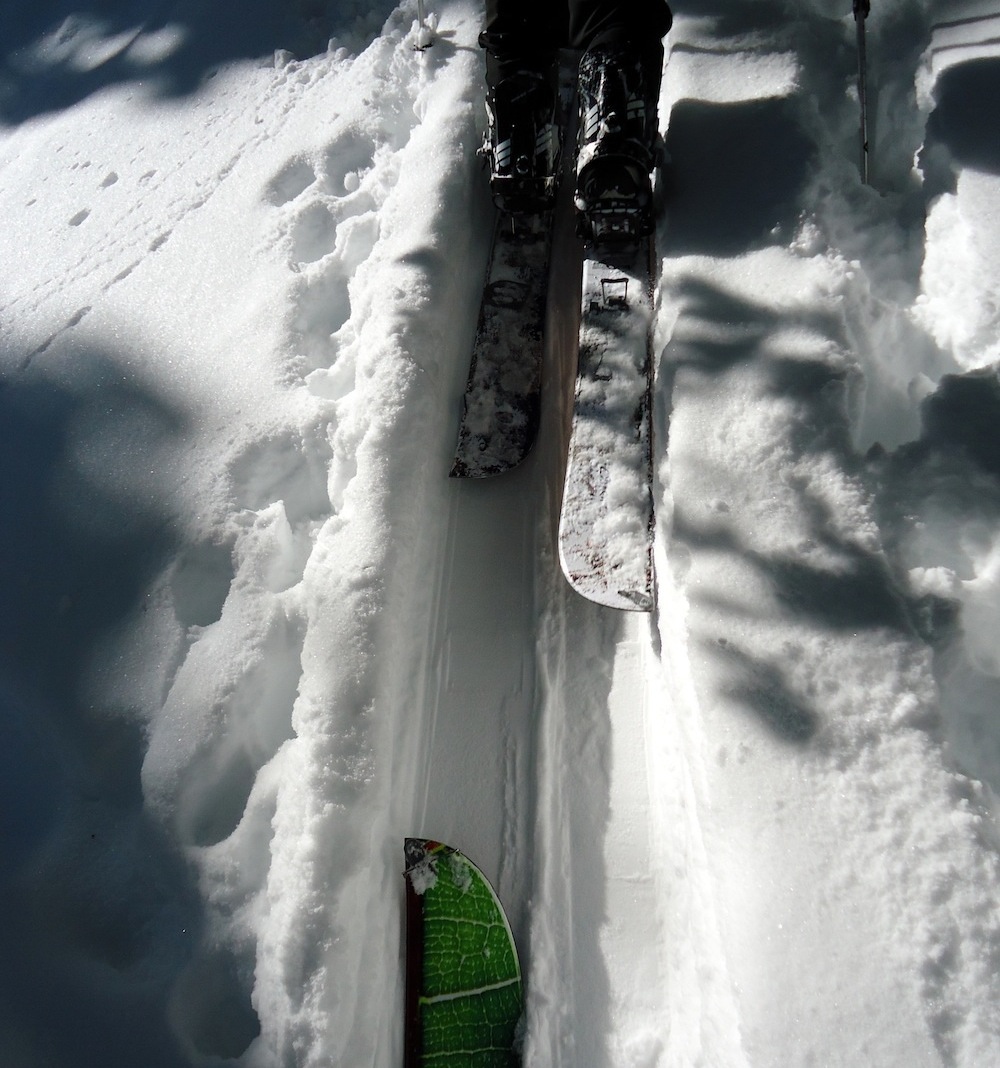
#8: Maximize Skin Contact While You Sidehill
It's a natural inclination to be on edges when you sidehill. But when you're on your edges, you're no longer on your skins, and you're more likely to slip back. There are exceptions, sometimes you need to really dig your edge in.
Instead of really trying to focus on your edges, rock your ankles to the downhill side so that you match the angle of the downhill ski and skins to the angle of the slope. Sometimes they will still slide. Sometimes I will point my skis up the fall line and almost sidestep up the hill, always rocking my ankle up the hill to maximize the skins' grip.
When you take a step with a downhill foot, plant your pole next to downhill ski to hold it in place. When I’m teaching Intro to Splitboarding classes, I’ll often assign students to read Splitboard.com's "The Traverse."
At some point, crampons will come into play. And booting will come into play. It varies for a lot of people. It's a personal thing you have to learn. There are no real hard and fast guidelines that I give students. I’ve certainly gotten to areas with students or clients and say, "Just unstrap, and we’ll boot up this short section right here."
#9: Learn How Your Edges Work To Ski Better
Some splitboard binding companies offer a heel lockdown system. Before companies were doing that, people would DIY. Apparently the skiing performance is better.
Going downhill with skins off is kind of uncomfortable. You don't want to have your weight too far forward or back. If I do need to ski down something, I would rather keep skins on than not. Some people are good skiers. They will strip skins, ski a short, 400-foot descent, transition back, and climb up to the larger, 3,000-foot descent. I’m not that good of a skier. I’ve often thought it’d be great to take a ski lesson. I've practiced a few times on a bunny slope.
I teach NOLS courses where I take students to climb up mountains. We have to come out of the mountains inevitably, and we're essentially skinning downhill. Skins add friction to slow yourself down. The route selection thing definitely comes into play–can you connect low-angle pieces to go downhill?
Knowing how your splitboard responds, and how your curved edges respond, is useful information. For example, if I’m skiing downhill and need to turn right, I need to weight downhill ski and lift all my weight off right foot to get the straight edge out of snow and get curved edge to turn.
If you have a quick transition already dialed, you're more likely to switch over for a short descent. If you dread your transitions, you won’t be excited to ski or to transition to ride a short section.
#10: Practice Transitions
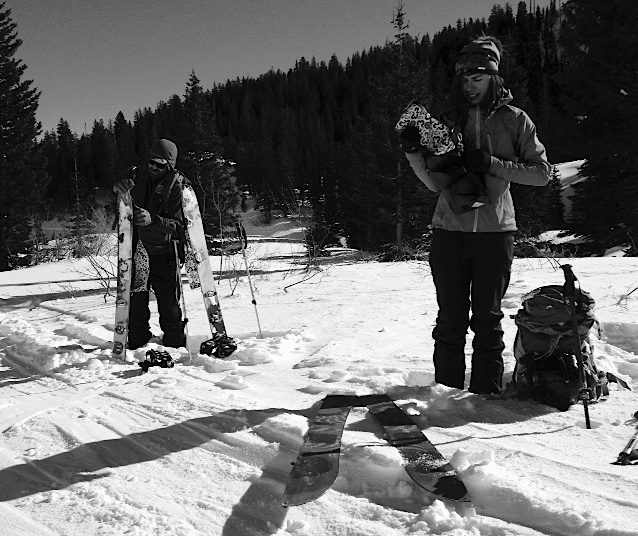 Robbins gets ready for a skin up Twin Lakes Pass. MacKenzie Ryan photo.
I think splitboarders have given ourselves a bad name among the backcountry touring community at large. Splitboarders don’t always know how to improve their transitions, and some don’t always take the time to dial in the transitions in their garage. The first time they’re doing their transitions is on top of a cold, windy peak. They need to jam on something, adjust a puck, and it turns into this 20 or 40 minute ordeal. That’s a story I hear all the time.
First, get the board set up correctly so your transition process can be fluid. The puck guide doesn’t line up perfectly all the time. You need to make micro-adjustments. A common thing I see: students use the puck guide, think they have their pucks and bindings set, and then the pin doesn't go through easily. Invest the time to make adjustments before you go out, and it helps your long-term happiness as a splitboarder.
Also, I keep some silicone lubricant spray, which I'll spray on my pucks and under my bindings, and it keeps stuff sliding really nicely.
Second, don’t transition on a cold, windy peak for the first time you use that set-up. Spend the time in a warm, dry environment. Spend time develop a system so that you are able to do it quickly. Do the same thing every time.
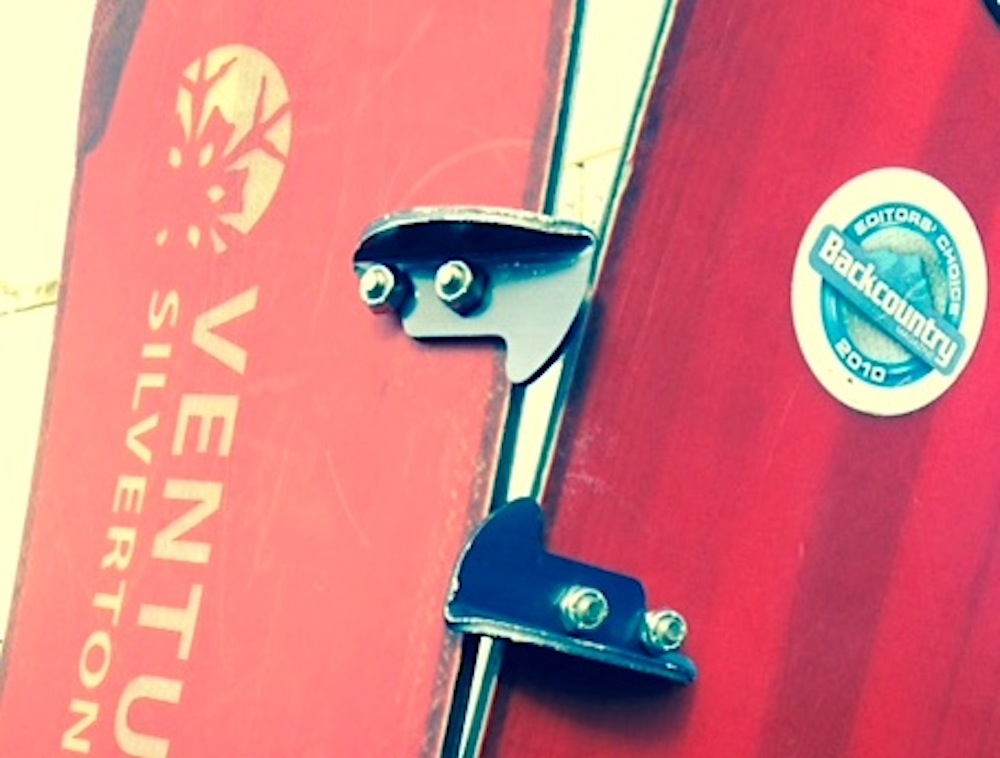 The appropriate angle to line up your Chinese hooks. MacKenzie Ryan photo.
Inevitably a splitboarder in a group of skiers is going to be disadvantaged. If you can streamline your transition, it will make it faster. For example, I rarely put ski poles on my pack. It's a small chunk of time I don’t need to add to my transition any more. If it’s a calm, mellow day on low-angle terrain, I don’t really need my goggles. Sometimes when I try to make a point to my students, I will strip my skins and stuff them in my jacket instead of my pack.
It's a balance for some people: do you want to do everything as quickly as you can, or relax. I vary my mindset depending on the group I'm in. A few years ago, I timed myself to transition as quickly as I could. Routinely, I could get it down to under two minutes and 30 seconds. If my skier friends can’t wait two and half minutes, I probably need new touring partners. If I take 30 minutes, I need to figure something out.
From The Column: Split Personality
Throwback: 8 Lessons Learned From A Year…
The Best Splitboarding Roadtrip You’ve Haven’t…

Is Meditation the Key to Enhancing Splitboard…
How To Become A Splitboard Guide with Joey Vosburgh

The Complete Guide to Improving Your Splitboard…

Top 5 Splitboarding Zones in Chile
__video_thumb.jpg)
Split Life Films: Getting Up to Get Down and Not…
10 Tips To Improve Your Splitboard Skinning with…
7 Boutique Splitboard Designs To Look At In 2015…

Meet The 1st Women’s-Specific Splitboard Brand…
__video_thumb.jpg)
Olaus Linn
February 20th, 2015
Rad piece - really solid advice throughout. I second the bit about skiing though - take a ski lesson! The basics will help immensely.
GBalls
February 21st, 2015
All great advice. I see a lot of people (including experienced travellers) who will walk up the hill instead of trying to glide up; by sliding the ski up instead of lifting and placing each times improves grip and saves a ton of energy.
amorenomtz
November 7th, 2015
Thank you for those advices!! I know the article isn’t about this but I have a question: How much can drag the overweight in our rucksack in the up hills / skinning? Could we consider an Airbag as extra weight or this extra weight as necessary in case of avalanche?
Denise Blair
July 19th, 2018
If you have a lack of knowledge and wanna go to the best college from an ordinary school you will need this service https://nerdymates.com/blog/satire-essay. You may order all type of academic papers there.
Emilia Black
December 11th, 2018
great 10 tips! thanks. I’m writing now literature review journal article, but I would advise you one more. good company and support! it is really a pledge of success